
There’s a special kind of magic that comes from baking old-fashioned recipes-a nostalgic blend of flavors and traditions passed down through generations. But for those living high above the clouds, the familiar joy of vintage baking often meets an unseen adversary: altitude. As the air thins, time-tested recipes can falter, leaving cakes flat and breads dense. “Mastering Vintage Recipes: High-Altitude Baking Made Easy” is your guide to unlocking the secrets of these culinary classics, adapted perfectly for lofty kitchens. Dive in as we unravel science and tradition, turning your high-elevation oven into a stage where vintage delights rise and shine with effortless grace.
Mastering Vintage Recipes: High-Altitude Baking Made Easy
Mastering vintage recipes becomes an enchanting adventure when adapting timeless techniques to conquer the unique challenges of high-altitude baking. Baked goods that once seemed elusive, with frustrating rises and unpredictable textures, transform into perfectly airy, tender delights through precision and understanding of classic ingredients. Let’s embark on a journey where old-world charm meets modern baking science, helping you unlock new heights-literally-in your kitchen.
Prep and Cook Time
Preparation: 20 minutes | Cooking: 30-35 minutes | Total Time: 50-55 minutes
Yield
Yields 12 classic vintage-style cupcakes-perfect for sharing at cozy gatherings or special celebrations.
Difficulty Level
Medium: Requires some attention to detail and patience for altitude adjustments, but well worth the results.
Ingredients
- 1 ¾ cups all-purpose flour, sifted
- 1 ½ teaspoons baking powder (double-checked for freshness)
- ¼ teaspoon baking soda
- ¼ teaspoon fine sea salt
- ½ cup unsalted butter, softened
- 1 cup granulated sugar
- 2 large eggs, at room temperature
- 2 teaspoons pure vanilla extract
- ¾ cup whole milk, warmed slightly
- 1 teaspoon lemon juice or apple cider vinegar (for milk acidification)
Instructions
- Preheat your oven to 350°F (175°C). Adjust to 335°F (168°C) if baking above 5,000 feet altitude. Line or grease a 12-cup muffin tin.
- Prepare the buttermilk substitute: Combine warm milk with lemon juice or vinegar. Let it sit 5 minutes. This acidified milk encourages tenderness and rise.
- In a bowl, sift together the flour, baking powder, baking soda, and salt. Sifting aerates the flour, ensuring smoother texture and uniform rise.
- Cream butter and sugar using an electric mixer at medium speed until light and fluffy, about 3-4 minutes. This crucial step traps air for lift.
- Add eggs one at a time, beating well after each. Stir in vanilla extract. Use room temperature eggs to help emulsify fats evenly.
- Alternate adding flour mixture and buttermilk to the creamed mixture in three parts, beginning and ending with flour. Fold gently but thoroughly after each addition to prevent overmixing.
- Distribute batter evenly into prepared cups, filling about two-thirds full. This prevents overflow while allowing space to rise.
- Bake for 30-35 minutes or until a toothpick inserted into the center comes out clean. Watch your oven carefully at altitude to avoid overbaking.
- Cool cupcakes in pan 5 minutes before transferring to a wire rack to cool completely. Proper cooling locks in moisture and crumb structure.
Tips for Success
- Flour Selection: Always opt for high-quality, unbleached all-purpose flour. If experimenting with cake flour for added tenderness, reduce quantity slightly to maintain structure at altitude.
- Leaveners: Fresh baking powder is your ally. At high altitudes, slightly reduce amounts to avoid rapid over-rising and collapsing.
- Liquid Adjustments: Consider adding a tablespoon or two more liquid in recipes above 3,500 feet to counteract faster evaporation.
- Mixing Technique: Avoid overmixing, which can toughen the crumb. Fold ingredients gently once flour is added.
- Oven Accuracy: Use an oven thermometer to ensure consistent temperatures. Many vintage ovens ran hotter, so calibrating modern equipment is essential.
- Make-Ahead: Batter can be prepared and refrigerated for a few hours before baking; just bring it back to room temperature and give it a gentle stir before filling.
Serving Suggestions
Display these vintage-style cupcakes on a delicate glass cake stand for timeless elegance. Garnish with a light dusting of powdered sugar, a dollop of freshly whipped cream, or a swirl of classic vanilla buttercream frosting. Add a sprinkle of finely chopped toasted almonds or edible flowers to evoke nostalgic charm. Pair each bite with a cup of rich Earl Grey or warm chamomile tea to complete a cozy, unforgettable experience.
| Nutritional Content (per cupcake) | Amount |
|---|---|
| Calories | 210 kcal |
| Protein | 3 g |
| Carbohydrates | 28 g |
| Fat | 9 g |

Mastering vintage recipes at high-altitude can be a gratifying endeavor with the right understanding of ingredient behavior and technique refinement. For an in-depth explanation of baking chemistry at altitude, check out this King Arthur Baking high-altitude guide. Also, explore our article on Timeless Cake Baking Techniques to deepen your classical baking skills.
Q&A
Q&A: Mastering Vintage Recipes – High-Altitude Baking Made Easy
Q1: What makes vintage recipes special for baking enthusiasts?
A1: Vintage recipes are like time capsules that bring classic flavors and traditions to your kitchen. They offer a glimpse into baking techniques from eras past, often emphasizing simple ingredients and heartfelt methods that evoke nostalgia and comfort. Mastering these recipes helps you connect with culinary history while creating timeless treats.
Q2: Why is high-altitude baking challenging, especially with vintage recipes?
A2: At high altitudes, the air pressure is lower, which affects how baked goods rise and cook. Vintage recipes, crafted with sea-level conditions in mind, often don’t account for these differences. This can make cakes collapse, cookies spread too thin, or bread become dry. Understanding these altitude quirks is key to adapting old-world recipes successfully.
Q3: What are the most common issues when baking vintage recipes at high altitude?
A3: The common culprits include faster evaporation of liquids, quicker rising of leavening agents causing over-expansion, and altered gluten development. This often results in baked goods that are too dry, crumbly, or unevenly textured. Identifying and tweaking recipe elements like flour, sugar, and baking powder will help overcome these pitfalls.
Q4: How can I adjust ingredients in a vintage recipe for high-altitude success?
A4: Begin by reducing baking powder or baking soda slightly-usually by 1/8 to 1/4 teaspoon-to control rising speed. Increase the liquid content (water, milk, or eggs) to compensate for quicker evaporation. You may also need a touch more flour to provide structure and reduce sugar a bit to prevent over-browning or collapsing.
Q5: Are there specific vintage recipes that are ideal for beginners at high altitude?
A5: Yes! Simple, sturdy recipes like basic pound cakes, drop cookies, and biscuits are excellent starting points. Their forgiving nature and minimal leavening adjustments make them ideal for experimenting. Once comfortable, you can advance to more delicate classics like soufflés or layered cakes.
Q6: Can modern kitchen tools assist in mastering high-altitude vintage baking?
A6: Absolutely. Tools like kitchen scales for precise measurements, oven thermometers to monitor accurate baking temperatures, and even digital timers will make a huge difference. Some bakers find altitude-adjustment apps and conversion charts handy for real-time recipe tweaking. Embracing technology can bridge the gap between old recipes and new environments beautifully.
Q7: What’s the best mindset to master vintage baking at high altitude?
A7: Patience, curiosity, and a willingness to experiment are your best allies. Each recipe is a learning journey, and failures are just tasty stepping stones toward perfection. By honoring tradition while adapting to your unique altitude, you can create delicious, nostalgic treats with a modern twist.
Q8: Any final tips for baking vintage recipes at high elevation?
A8: Always start by researching the altitude of your specific location. Keep detailed notes on any changes made and their results. Consider making small test batches before committing to larger ones. Most importantly, savor the process-baking vintage style at high altitude is as much about joy and discovery as it is the delicious outcome!
Final Thoughts
As you embark on your high-altitude baking adventures, remember that mastering vintage recipes is both an art and a science. By blending time-honored techniques with altitude-smart adjustments, you can revive treasured flavors with newfound confidence and ease. So gather your ingredients, embrace the quirks of thinner air, and let these classic recipes rise to the occasion-turning every bite into a delicious tribute to the past, perfectly adapted for the peaks. Happy baking at high altitude!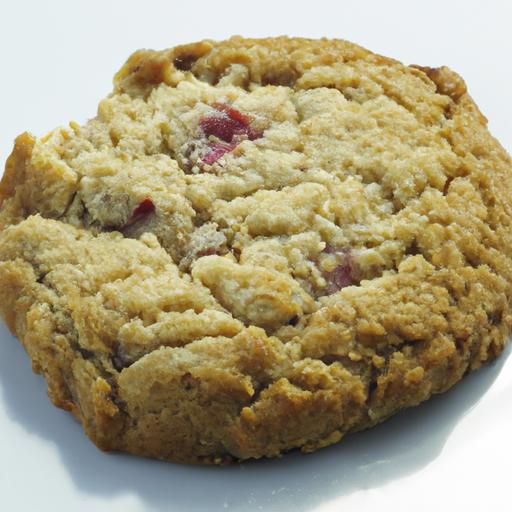


