In a world buzzing with endless snack options, there’s a special kind of magic that happens when you make your own treats at home. Welcome to the realm of “Snack Smarts,” where creativity meets flavor, and the humble act of crafting your own snacks transforms into a delightful adventure. Beyond convenience and store-bought labels lies a vibrant playground of ingredients, colors, and textures just waiting to be mixed, matched, and mastered in your very own kitchen. Whether you’re a seasoned foodie or a curious beginner, discovering the art of DIY treats not only sparks joy but also empowers you to snack smarter-tailoring every bite to suit your taste, health goals, and imagination. So, roll up your sleeves and get ready to unleash the magic of homemade snacks that are as nourishing as they are delicious.
Snack Smarts are essential when crafting homemade treats that not only delight the palate but nourish the body. Choosing wholesome ingredients for DIY snacks elevates everyday bites into vibrant, flavorful experiences that celebrate natural goodness. This thoughtfully crafted guide empowers you to transform simple pantry staples into crave-worthy snacks using creative techniques that balance taste and nutrition seamlessly.
Prep and Cook Time
Preparation: 15 minutes
Cooking: 20 minutes
Total Time: 35 minutes
Yield
Serves 8 generous snack portions
Difficulty Level
Easy to Medium – Perfect for both beginners and seasoned home chefs experimenting with nutritious treats
Ingredients
- 1 cup rolled oats (gluten-free if preferred)
- 1/2 cup raw almonds, roughly chopped
- 1/4 cup chia seeds for natural fiber and omega-3
- 1/2 cup unsweetened shredded coconut
- 1/3 cup creamy natural almond butter
- 1/4 cup organic honey or pure maple syrup for vegan option
- 1 tsp vanilla extract
- 1/2 tsp sea salt
- 1/3 cup dark chocolate chunks (70% cocoa or higher)
- 1/4 cup dried tart cherries or other dried fruit, unsweetened
Instructions
- Preheat your oven to 350°F (175°C). Line a baking sheet with parchment paper to prevent sticking.
- Toast the oats and almonds: Spread oats and chopped almonds evenly on the baking sheet and toast for 10-12 minutes, stirring halfway through, until fragrant and lightly golden to intensify flavor.
- Combine wet ingredients: In a small saucepan, gently warm almond butter and honey over low heat until smooth and fluid. Stir in vanilla extract and sea salt, mixing thoroughly.
- Mix dry ingredients: In a large bowl, combine toasted oats and almonds, chia seeds, shredded coconut, dried cherries, and chocolate chunks.
- Bring it all together: Pour the warm almond butter mixture over the dry ingredients. Using a sturdy spatula, fold everything together until the mixture is evenly coated and sticky.
- Press firmly: Transfer the mixture to an 8-inch square pan lined with parchment paper. Press down firmly with the back of a spatula or your hands to create an even layer.
- Chill and set: Refrigerate for at least 2 hours until firm enough to cut into bars or squares.
- Store properly: Keep the bars in an airtight container in the fridge. Enjoy within a week for the freshest taste.
Tips for Success
- For a nut-free alternative, substitute almond butter with sunflower seed butter and almonds with pumpkin seeds.
- If you prefer softer bars, slightly reduce toasting time; longer toasting creates crunchier texture and deeper flavor.
- To make this recipe gluten-free, confirm your oats are certified gluten-free to avoid cross-contamination.
- Customize with your favorite mix-ins: try dried blueberries, chopped pistachios, or hemp seeds.
- Use silicone molds for perfectly shaped individual portions-simply press mixture in and chill.
- Allow bars to come to room temperature for 10 minutes before eating if refrigerated, for optimal chewiness.
Serving Suggestions
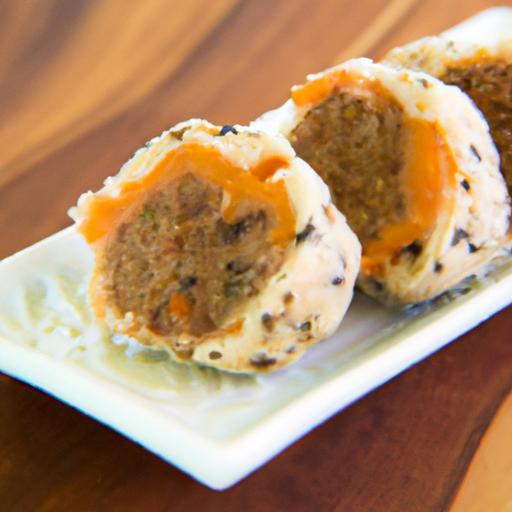
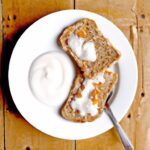
Present your wholesome snack bars on a rustic wooden board sprinkled with toasted coconut flakes and fresh berries for a feast of colors and textures. Pair them with a warm cup of herbal tea or a chilled smoothie to complement the natural sweetness and rich nuttiness. For gatherings, serve alongside a bowl of Greek yogurt drizzled with honey and a sprinkle of cinnamon for an elevated snack experience that balances indulgence with wellness.
| Nutrient | Per Serving |
|---|---|
| Calories | 210 kcal |
| Protein | 6 g |
| Carbohydrates | 22 g |
| Fat | 11 g |
Discover more healthy snack recipes on our site to expand your collection of nourishing bites. For further insights on ingredient benefits, visit the Healthline guide to healthy snacks, a trusted source for nutrition experts.

Q&A
Q&A: Snack Smarts – Discover the Magic of DIY Treats at Home
Q1: Why should I bother making snacks at home instead of buying them?
A1: Making snacks at home transforms the humble act of munching into a delightful adventure! You gain full control over ingredients-meaning fresher, healthier, and customized treats tailored perfectly to your cravings. Plus, the process sparks creativity, saves money, and fills your kitchen with irresistible aromas. It’s snack time, but smarter and more magical!
Q2: What are some easy DIY snack ideas for beginners?
A2: Start simple and sensational! Think energy balls rolled with dates, nuts, and cocoa powder; crunchy roasted chickpeas dusted with spices; or vibrant veggie sticks paired with creamy hummus. Even microwave mug brownies or homemade popcorn drizzled with dark chocolate can be your gateway into DIY snacking bliss.
Q3: How can DIY snacks help with healthier eating habits?
A3: Homemade snacks shed the mystery of hidden sugars, additives, and preservatives lurking in store-bought goodies. When you craft your own, you choose wholesome, nutrient-rich ingredients. This means snacks can support sustained energy, curb overeating, and turn snacking into a nourishing ritual rather than guilt-tripping indulgence.
Q4: What equipment or tools do I need to get started?
A4: No need for fancy gadgets! A blender or food processor, mixing bowls, measuring cups, a baking sheet, and some storage containers make a perfect starter pack. As you progress, items like silicone molds or an air fryer can elevate your snack creations, but the magic mainly comes from your hands and imagination.
Q5: Can DIY snacks cater to special dietary needs?
A5: Absolutely! DIY snacks are a playground for customizing everything from gluten-free granola bars to vegan cheese dips or nut-free energy bites. You set the rules and can experiment with alternative flours, natural sweeteners, and allergy-friendly ingredients that perfectly fit your lifestyle.
Q6: How do I keep my homemade treats fresh?
A6: Treat your DIY snacks like precious treasures! Store dry treats like cookies or granola in airtight containers at room temperature, while moist snacks (think fruit bars or hummus) do best in the fridge. For extra longevity, freeze batches to thaw and enjoy whenever cravings strike.
Q7: Any tips to make DIY snack-making more fun?
A7: Turn up your favorite tunes, invite friends or family for a snack-making party, and don’t be afraid to get playful with flavors and textures. Try using unexpected ingredients like matcha, chili, or coconut flakes. Remember, perfection isn’t the goal-exploration and joy are the real treats.
Unlock the enchanting world of DIY snacks and let every bite you create at home tell a delicious story of health, happiness, and homemade magic!
Wrapping Up
As the dust settles on your homemade treats and the last crumb is savored, the true magic of DIY snacking reveals itself: a blend of creativity, control, and comfort all wrapped into one delicious experience. By crafting your own snacks at home, you’re not just feeding hunger-you’re nourishing curiosity, health, and imagination. So next time cravings call, remember that the best snacks don’t just come from a bag or a box-they come from your own kitchen, where every bite tells a story you’ve made yourself. Embrace the art of snack smarts, and let your taste buds explore the endless possibilities that await behind your pantry door. Happy munching!