
In the world of home canning, the humble jar is your trusty companion, preserving nature’s bounty and transforming seasonal flavors into year-round delights. But before you seal in the sweetness of ripe tomatoes or tangy peaches, there’s a crucial step that ensures your jars are as safe as they are scrumptious-sterilization. Welcome to your ultimate guide to sterilizing jars like a pro, where science meets tradition and safety meets satisfaction. Whether you’re a seasoned preserving expert or a curious beginner, mastering this essential process will elevate your canning game, protect your harvest, and keep your pantry stocked with homemade goodness you can trust. Let’s dive in and turn those jars into shining sentinels of flavor, freshness, and food safety!
Sterilize jars like a pro to safeguard your homemade preserves with pristine hygiene and lasting freshness. Canning is a cherished culinary tradition, but the secret to success lies in ensuring your jars are impeccably sterilized. Whether you’re preserving the vibrant tang of summer tomatoes or the fragrant sweetness of homemade jams, understanding how to effectively sterilize jars is your first step towards delicious, safe results that will thrill every guest at your table.
Prep and Cook Time
- Preparation: 15 minutes
- Sterilization Process: 45 minutes
- Total Time: 1 hour
Yield
Sanitizes 6-12 standard 16 oz canning jars (depending on method)
Difficulty Level
Easy to Medium – Suitable for beginners and advanced canners alike
Ingredients
- 6 to 12 glass canning jars with lids and rings
- Filtered water for boiling and rinsing
- White vinegar (optional, for extra sterilization)
- Clean dish towels or a drying rack
- Large pot or canning pot with lid
Instructions
- Inspect and prep jars: Begin by carefully examining each jar for chips or cracks-damaged jars compromise safety. Remove labels if necessary by soaking jars in warm water mixed with a tablespoon of white vinegar, helping dissolve adhesives.
- Choose your sterilization method: Decide based on your kitchen setup:
- Boiling Water Bath: Submerge jars fully in a large pot filled with filtered water. Bring to a rolling boil and maintain for at least 10 minutes. Extend time if you’re above 1,000 feet elevation.
- Oven Sterilizing: Preheat your oven to 275°F (135°C). Place clean jars on a baking tray, ensuring they don’t touch, and heat for 15-20 minutes. Use oven mitts carefully as jars will be hot.
- Dishwasher Cycle: Run jars through a sterilizing cycle on the hottest setting without detergent.
- Prepare lids and rings: Unlike jars, lids should not be boiled. Instead, simmer lids in hot water off heat to soften seals. Leave rings at room temperature, ready for sealing.
- Dry with care: Use a clean dish towel or air dry jars upside down on a rack. Avoid contamination by handling jars with sterilized tongs or clean hands only.
- Maintain sterile conditions: Keep sterilized jars covered until filling. Avoid touching the inside or rims post-sterilization. Work expeditiously when filling to prevent airborne germs from settling.
Expert Tips for Maintaining Sterile Conditions Throughout the Canning Process
- Work in a clean and organized space: Clear surfaces and sanitize them with food-safe disinfectants before starting.
- Use a jar lifter or tongs: This minimizes direct contact and contamination risks.
- Fill jars immediately: Fill jars while they’re still hot to prevent glass breakage and promote vacuum sealing.
- Seal jars properly: Wipe jar rims with a damp clean cloth to remove residue before placing lids and rings.
- Test seals after cooling: Press the center of each lid-if it flexes, the seal isn’t airtight and should be refrigerated for immediate use.
Chef’s Notes
- Substitution tip: For adding an acid boost to your boiling water, add 2 tablespoons of white vinegar per quart of water to help inhibit bacterial growth during sterilization.
- Make-ahead tip: Sterilized jars can safely be stored, covered and inverted, for up to 24 hours before canning.
- Common issue troubleshooting: Avoid cracks caused by sudden temperature changes by warming jars gradually or starting sterilization with warm water.
- Bonus: Consider investing in a pressure canner if you plan to preserve low-acid foods frequently; safe sterilization and processing times vary accordingly.
Serving Suggestions
Once your jars are thoroughly sterilized and filled, your beautifully sealed preserves will maintain vibrant flavors and textures. Present your canned goods gifted in rustic wooden crates lined with parchment paper. Adorn jars with handwritten labels and fabric covers for that artisanal touch. Use your homemade jams as luscious spreads for breakfast pastries, or incorporate your pickled vegetables as savory accents in salads and charcuterie boards.

Related Resources
Discover more about water bath canning techniques for an all-encompassing preserving experience.
For official food safety guidelines, visit the National Center for Home Food Preservation.
| Method | Time | Temperature | Best For |
|---|---|---|---|
| Boiling Water Bath | 10-15 mins | 212°F (100°C) | High acid foods (fruit jams, pickles) |
| Oven Sterilizing | 15-20 mins | 275°F (135°C) | Dry sterilization of empty jars |
| Dishwasher Cycle | Approx. 30 mins | Hot cycle | Convenient sterilizing for jars |
Q&A
Q&A: Sterilize Jars Like a Pro – Ultimate Guide to Safe Canning
Q1: Why is sterilizing jars essential for safe canning?
A1: Sterilizing jars eliminates harmful bacteria, yeasts, and molds that could spoil your preserves or cause foodborne illnesses. Think of it as creating a clean, safe home for your delicious jams, pickles, and sauces-no unwelcome guests allowed!
Q2: What are the best methods to sterilize jars at home?
A2: The classic arsenal includes boiling, oven sterilizing, and using a dishwasher cycle with a high-heat setting. Boiling is a trusty favorite: submerge jars in boiling water for 10 minutes. Oven sterilizing involves warming jars at 275°F (135°C) for about 20 minutes. Each method has its fans, but boiling remains the gold standard for thorough safety.
Q3: Can I skip sterilizing if I’m processing jars in a pressure canner or water bath?
A3: If your processing time is 10 minutes or longer, the heat from the canning process generally sterilizes the jars. However, for shorter processing times or raw-pack recipes, pre-sterilizing jars adds an extra layer of safety and peace of mind.
Q4: How should I handle jars after sterilizing to keep them germ-free?
A4: Use clean tongs or a jar lifter to move jars-hands are bacteria highways! Place sterilized jars on a clean towel or rack until they’re ready to be filled. Avoid touching the inside or the rims to keep every sip and bite safe and pure.
Q5: What about lids and bands? Do they need sterilizing too?
A5: Lids should be washed and kept hot in simmering water (not boiling) until ready to use, ensuring the sealing compound softens for a tight seal. Bands just need a good wash and drying; sterilizing them is unnecessary since they don’t touch the food or form the seal.
Q6: Any clever tips for busy canners to speed up the sterilizing process?
A6: Absolutely! Fill your canner or large pot with jars and water, bringing them to a simmer while you prep your recipe. This multitasking means jars are steaming and sterilizing simultaneously. Also, avoid washing jars with soap right before filling to prevent residue-hot water rinse is usually enough.
Q7: How do I know my jars are truly sterilized and safe to use?
A7: Sterilized jars will look spotless, free from chips or cracks. The key is not just how they look but ensuring they reach the right temperature for the recommended time. Trust the process: boiling 10+ minutes or oven heating as instructed will give you jars ready to house your homemade goodness safely.
Sterilizing jars may sound like a ritual, but it’s the secret handshake to the elite canners’ club-guaranteeing your pantry treasures stay flavorful and safe, jar after jar. Happy canning!
In Summary
Mastering the art of sterilizing jars is more than just a step in canning-it’s your ticket to preserving freshness, flavor, and safety in every jar you seal. With these expert tips and techniques, you’re now equipped to turn humble glass containers into trusted guardians of your homemade preserves. So, roll up your sleeves, embrace the process, and can with confidence knowing that each jar you sterilize is a shining example of food safety done right. Here’s to delicious creations that last-and the timeless joy of sharing them with those you love!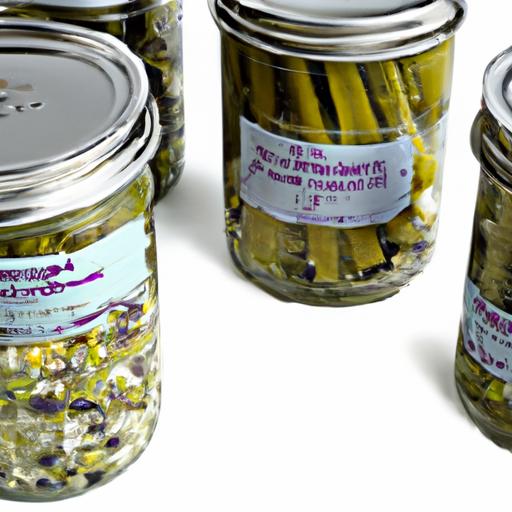


