
In the world of baking, some techniques whisper secrets that transform simple ingredients into irresistible delights. Among these, the creaming method stands out as a timeless magic trick-where butter and sugar waltz together to create a tender, airy foundation for cakes, cookies, and more. Unlocking the sweet secrets of this classic method reveals not only the science behind its fluffy texture but also the artistry that turns everyday batter into melt-in-your-mouth masterpieces. Join us as we delve into the enchanting process of creaming, uncovering how its charm shapes the very soul of your favorite baked treats.
Unlocking Sweet Secrets through the science of the creaming method reveals why achieving that light, fluffy texture in cakes and cookies starts with technique and ingredient harmony. This foundational baking step is the secret to the perfect crumb and tender bite that transforms simple sweets into crowd-pleasers. Whether you’re an aspiring baker or refining your craft, understanding each element in this process will elevate your desserts beyond expectation.
Prep and Cook Time
- Preparation: 15 minutes
- Cooking/Baking: 25-35 minutes (depending on recipe)
- Total Time: 40-50 minutes
Yield
Approximately 12 servings (varies by recipe and portion size)
Difficulty Level
Medium – perfect for bakers with basic mixing knowledge ready to deepen their kitchen skills.
Ingredients
- 1 cup (227g) unsalted butter, softened – room temperature for optimal creaming
- 1 cup (200g) granulated sugar – fine or caster sugar preferred
- 2 large eggs – at room temperature
- 2 teaspoons pure vanilla extract
- 2 ½ cups (312g) all-purpose flour, sifted
- 1 teaspoon baking powder
- ½ teaspoon fine sea salt
- ½ cup (120ml) whole milk – warmed slightly
Instructions
- Prepare your ingredients: Ensure the butter is at room temperature-soft but not melting. Warm the milk slightly to aid in emulsification.
- Cream the butter and sugar: Using a stand mixer fitted with a paddle attachment or a hand mixer, beat the butter alone on medium speed until it becomes pale and smooth, about 1 minute. Add the sugar gradually and increase speed to medium-high, beating for 4-5 minutes. The mixture should become light, fluffy, and visibly increase in volume.
- Incorporate the eggs: Crack in the eggs one at a time, mixing gently after each addition. Follow immediately with the vanilla extract to maintain a smooth batter without curdling.
- Sift and combine dry ingredients: Whisk together the flour, baking powder, and salt to aerate and remove lumps.
- Alternate adding dry ingredients and milk: With the mixer on low speed, add one-third of the flour mixture, followed by half the milk. Repeat once more, finishing with the last third of flour. Mix just until incorporated; over-beating will deflate the batter.
- Scrape the bowl and check consistency: Use a rubber spatula to fold and ensure no streaks remain. The batter should be smooth, airy, but thick enough to hold shape.
- Bake accordingly: Transfer batter to a prepared pan and bake in a preheated oven at the temperature specified by your chosen recipe, usually 350°F (175°C). Use a toothpick to check doneness.
Chef’s Notes and Tips for Success
- Select quality unsalted butter with a high fat content for richer flavor and better creaming performance.
- Room temperature eggs mix more evenly: If forgotten, warm them gently by placing in warm water for a few minutes.
- Use a stand mixer when possible: It ensures consistent speed and texture, yielding a perfect creamed base.
- Do not rush the creaming process: Proper air incorporation can take several minutes but is crucial to structure and fluffiness.
- If your batter appears curdled: Continue mixing gently; it often smooths out unless the fats and liquids are too cold.
- Store butter properly: Butter that is too soft or partially melted will fail to trap air, resulting in dense baked goods.
- Try powdered sugar instead of granulated sugar for a finer crumb and delicate mouthfeel in some recipes.
- Make-ahead tip: Creamed butter and sugar can be refrigerated overnight, just bring to room temperature before adding eggs.
Serving Suggestions
Reveal your creation’s perfectly tender texture by slicing and garnishing with fresh berries, a dusting of powdered sugar, or a drizzle of homemade glaze. Complement with a scoop of vanilla bean ice cream or a dollop of lightly whipped cream to add indulgence. For a charming rustic presentation, serve on a wooden board with edible flowers and a side of herbal tea or freshly brewed coffee.

| Nutrient | Per Serving |
|---|---|
| Calories | 320 kcal |
| Protein | 4g |
| Carbohydrates | 38g |
| Fat | 16g |
Understanding the Magic of Creaming: Choosing the Right Ingredients
Unlocking Sweet Secrets in baking starts with ingredient synergy. Always opt for fresh, high-quality butter-ideally European-style-with a higher butterfat percentage; it traps air more efficiently during creaming. Granulated sugar acts physically in this step, cutting into butter, creating pockets of air that expand during baking. Even the choice of flour matters-sifted all-purpose flour ensures an even mixture and prevents dense spots. Room temperature ingredients are critical: cold eggs or milk hinder emulsification, resulting in an uneven texture.
Mastering the Creaming Method Step by Step
Begin by softening butter-not melting-to a spreadable consistency that still holds shape. The creaming process physically incorporates air bubbles, essential for rise and light crumb. Beat on medium-high speeds to reach the pale, fluffy consistency that signals readiness. Adding sugar gradually allows it to dissolve slowly, further entrap air. Eggs introduced one at a time prevent curdling and keep the batter stable. Alternating dry ingredients with milk keeps the batter smooth without overworking gluten, which would toughen the baked good.
Troubleshooting Common Creaming Mistakes
- Dense or flat cakes: Usually a result of under-creaming or using cold butter. Ensure butter is softened properly and beat long enough.
- Curdled batter: Caused by adding eggs too fast or when ingredients are too cold. Add eggs slowly and keep everything at room temperature.
- Over-mixed batter: Leads to a gummy or tough texture as gluten develops excessively. Mix just until combined after adding flour.
- Inconsistent texture: Scrape the bowl often to distribute ingredients evenly and avoid lumps.
For a deeper dive into baking science, check out King Arthur Baking’s expert guide. And explore our comprehensive guide on creaming methods to unlock even more sweet secrets and elevate your baking craft.
Q&A
Q&A: Unlocking Sweet Secrets – The Magic of the Creaming Method
Q1: What exactly is the creaming method in baking?
A: The creaming method is a classic baking technique where sugar and fat-usually butter-are beaten together until they form a light, fluffy mixture. This process cushions and aerates the batter, creating a tender, airy crumb that’s essential for cakes, cookies, and other baked delights.
Q2: Why does creaming butter and sugar make such a difference?
A: When you cream butter and sugar, you’re not just mixing ingredients-you’re trapping tiny air bubbles in the fat. These bubbles expand in the oven as heat activates the leavening agents, helping the batter rise and giving you that soft, melt-in-your-mouth texture you crave.
Q3: Is the temperature of the butter important?
A: Absolutely! Room temperature butter is your best friend here. Too cold, and it won’t whip properly; too warm and it becomes oily and won’t hold air effectively. Ideally, it should be soft enough to press with your thumb but still hold its shape.
Q4: Can I use a mixer or should I do it by hand?
A: Both work, but a stand mixer or hand mixer makes creaming easier and faster, ensuring a consistent, fluffy texture. That said, hand-beating can be a great workout! Just be patient and whip until the mixture looks pale and fluffy-usually a few minutes.
Q5: Does the creaming method work for all cakes?
A: It shines brightest in butter-based cakes like classic yellow cake, pound cakes, and many cookie recipes. But for wetter batters like sponge or chiffon cakes, other methods such as whipping eggs might be preferable. Knowing your cake’s needs unlocks the magic every time.
Q6: How do I know when I’ve creamed long enough?
A: Look for a change in color and texture-the mix should go from dull and dense to visibly lighter in color and fluffy in appearance. If you press the mixture with a spatula, it should feel airy and soft, not grainy or greasy.
Q7: Any secret tips for maximizing the creaming method’s magic?
A: Yes! Start slow to dissolve the sugar a bit-this helps texture. Also, add eggs one at a time afterward, beating well after each addition to keep the air bubbles intact. Finally, gently fold in your dry ingredients to maintain that buttery lightness.
Unlock the creaming method, and you unlock a universe of sweet possibilities where texture and flavor dance effortlessly-ready to dazzle every palate and elevate your baking from good to magical!
Closing Remarks
As we wrap up our journey into the enchanting world of the creaming method, one thing is clear: this timeless technique is more than just a step in baking-it’s the secret passage to light, fluffy, and irresistibly tender treats. By expertly blending butter and sugar, you invite air to dance within your batter, creating textures that delight the palate and elevate everyday desserts to extraordinary heights. Whether you’re a curious novice or a seasoned baker, mastering the magic of creaming unlocks endless possibilities, ensuring each bite carries the perfect harmony of flavor and finesse. So next time you whisk and cream, remember-you’re not just mixing ingredients; you’re conjuring sweet secrets, one airy spoonful at a time.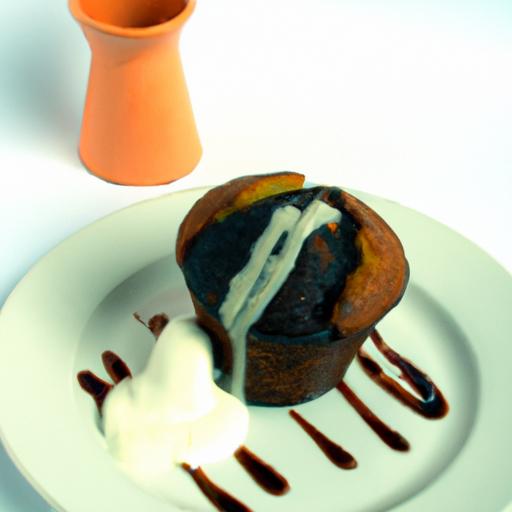


